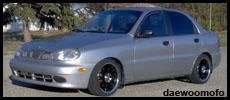
Hood scoop - (Project Phase 1 Completed with Pics on Page 4)
Moderators: daewoomofo, Moderators Group
-
- Posts: 25
- Joined: Thu Dec 01, 2005 5:37 pm
- Location: Melbourne, Florida
- Contact:
The reason for the color differences between your hood and the scoop is age. Paint fades over time, particularly when they arent well maintained or if they are single-stage. This will be most apparent on broad areas most exposed to the sun (i.e. your hood, roof, and trunk). Your car is just over six years old, meaning the sun has had six whole years to have its way with your paint job.
This will result in a slightly dulled, lighter finish. Meaning your scoop, being only a few days into its own paint job, will look slightly sharper/darker. Unfortunately, not much you can do unless you plan on repainting the whole car.
A good friend of mine heads up the body department at a local Ford dealer. I helped (or sort of watched ) him repaint his '92 5.0L 'stang, after which I asked him about the waxing/buffing. If you think about it, waxing is effectively sealing your paint against the outside elements. The same applies to the different compounds that give off gases in the paint. Waxing, etc, too early cam cause tiny bubbles to form in the top coat of your paint, because those gases cant escape. Now with the poly-silver, that may not be noticable, but his Mustang was black, so we needed the mirror finish.
He recommended waiting at least 30 days before a coat of wax is applied.
Its looking good though, cant wait to see it on the car.
Geoffrey
Last edited by FearTheWoo on Wed Mar 08, 2006 7:17 pm, edited 1 time in total.
Yeah... I read that same thing. That's why I'm not going to wax it. Allegedly though, the buffing/polishing is okay because it doesn't seal it, just helps you along the way towards that shiny finish. I'm thinking it might turn out really well. The only thing I'm actually worried about is that spot on the side that the primer was showing after the first sanding. I put the paint on a little thicker this last time, but I'm effectively out of paint unless I buy another can. So I've gotta be really careful about this last bit of effort to bring it up to shine. I read I shouldn't wax it for up to six months in order to let the solvents in the paint fully evaporate.
Yeah... I can't wait to see it on the car either hehe.
After sanding it down some, I've decided to go ahead with another couple coats of paint. Just wasn't up to where I wanted it to be. Went to a different paint shop for my paint this time. I think I'll be happier with the results, also, they gave me a lot more info and advice then the other place did.
Well... I think it's coming along alright. A couple of trouble spots in the paint on this latest coat. It's still curing so I have a bit of time to think about how to fix the problem areas tomorrow night. Here's a few pics of it:
As you can see I have some "nibbs" in a couple spots. I'm a little worried about how those spots are going to look after sanding. I do have enough paint for yet another coat if needed, but I'm hoping I can sand the problem areas and not have it look bad when I do. I also had a small run on the left side (which you can see in the third pic). I also don't know how this run will react to my sanding. I'd hate for it to show more then it does after I start sanding.
Honestly, this has been a really good project for me. A few good things have come from it so far... I've learned a whole lot more about paint then I used to know (tons more I don't know still though), I also found a really good automotive paint supply store here in town. That's a good thing to know about since I'm planning on re-spraying the entire car sometime in the future (probably next year). Also, it's been fun (except when I accidentally sanded too deep).
So if anyone has suggestions on how I should remove those imperfections and not make matters worse, I'd appreciate it. Of course, even if nobody can answer that, I'll laboring on with it... Sanding is planned for tomorrow night.
Oh yeah... I also found out today that there is a variation in the Poly Silver paint used on the Lanos (at least in the sherwin williams line). There is Standard and 'Variation A'. The only place where Variation A is used is on certain Forenza's (and only certain vin numbers at that). So... if you happen to have a Poly Silver Forenza, try to find a shop that knows about and can mix the 'Variation A' version of Poly Silver for you. It is EVER so slightly brighter then the original Poly Silver based on the paint chip I compared to my hood. The Poly Silver standard was a dead on match to my hood according to the chip.
And according the cool color computer they had (a computer camera thing they put on your car to read the paint and aproximate the correct color), the computer determined that my paint is only .1% off from the original color. This new can looks a LOT closer to the original color then the stuff I first got. So... I think this re-spray I fixed the problem with the color matching.
-
- Posts: 25
- Joined: Thu Dec 01, 2005 5:37 pm
- Location: Melbourne, Florida
- Contact:
Lookin' sharp Johnny, came out real nice I'd say, great job with the painting.
As for the sanding, the only reccomendations I have at this point is to sand very lightly. Its always easier to go back and sand some more than it is to reapply the paint because you went too deep (I'm sure you know what point that is at now ).
The imperfections on the passenger side are only slightly noticable, except along the outer edge, but should come out with the wet-sanding.
I really like it, you've seriously made me re-visit the idea of putting a scoop on my own 'woo.
Geoffrey
Well... I'm nearing the point when it will go on the hood. I will be mounting it sometime tomorrow if the weather is good.
I've placed it on the hood but not attached it in the following pics. It isn't perfect dead on center (or maybe it is and I'm really good at eyeballing it)... hehe I'll be measuring and making sure it's very very centered and straight when I actually attach it. Anyway... here it is:
Yeah... I know my bumper is crap... haha... and my car is dirty... and well... I have too many dents. Give me some time, I'll get that all taken care of eventually.
-
- Moderator
- Posts: 4795
- Joined: Fri Nov 18, 2005 1:41 am
- Location: 313
Project completed
Well.. I've mounted it on the hood and I think it looks great! Thanks for all the compliments and keeping tabs on this for so long... Oh and hehe... I used some "photoshop touch-up paint" on my door and bumper in these pics... didn't touch anything else though. So... Project Hood Scoop Phase 1 completed:
Mounting it was a snap by the way... no trouble at all. I took some extra time to make triple sure I got it centered exactly where I wanted it. I really think it brings out some of the Subaru Impreza influences that the Lanos seems to have. Of course... Now it is dramatically apparent to me that I MUST get myself a nice spoiler (but that is for another thread).
-
- moron
- Posts: 4493
- Joined: Wed Dec 08, 2004 5:18 am
- Location: Knoxville, Tennessee
- Contact: