http://www.mx6.com/forums/showthread.php?t=150665
I bought a bench grinder, a couple of polishing wheels, a few green and white polishing compound bars and all different grades of wet and dry sand paper from my local hardware store.
The cut down step by step process i did was...
* Wash and clean the metal part thoroughly
* Spray the part down with WD40
* Dip some wet and dry sand paper in a cup of mixed water and WD40
- For deep scratches or chips you may need to start with a coarse grade (say 240 or even 180) of sand paper and slowly work your way to the finer paper to get a smooth finish.
- For most parts that weren't badly chipped or scratched I started with 400, then 600 then 1200 (which is almost smoother than A4 printing paper - but it works out those fine scratches). Remember to keep the piece wet with WD40 and water.
- To answer the next inevitable question - yes, this did take ALOT of time
* Once the part was sanded smooth, slowly buff the piece using the polishing wheel with compound on the bench grinder.
- If you get too much build up/burn marks on the piece, you can rub them off with a soft rag. For more stubborn marks, WD40 will dissolve them quickly but make the piece greasy - so you'll need to rewash the piece.
- You may need a few passes to bring the piece up to mirror finish, work slowly and evenly...
* When the piece is to mirror finish, change to a soft cotton buffer with white finishing compound and redo the piece for a final sparkle finish
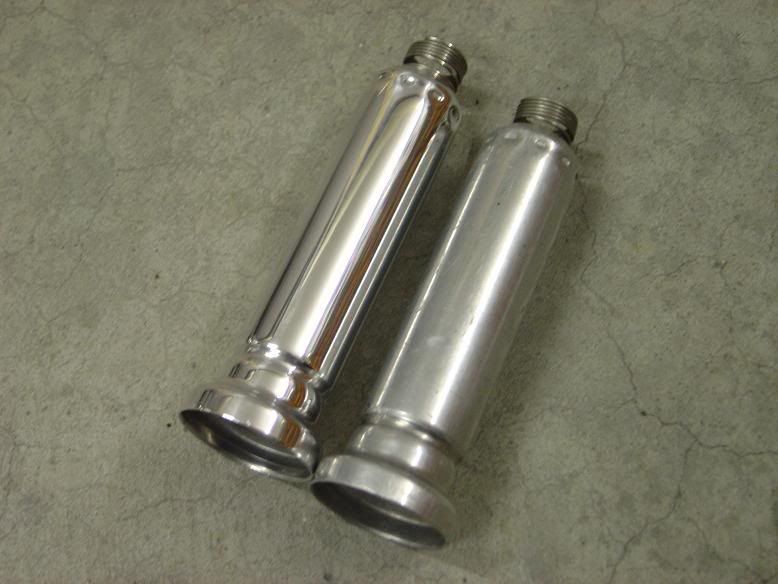
Here is a sample of what can be achieved! You all remember my clean engine bay... well these are my spark plug covers and what an amazing difference! The photo doesn't even do it justice!

Im getting addicted to polishing
This could be good for the cam cover on the DOHC engines?
--Tim